Quickstart
Go end-to-end in about 10 minutes — import a price sheet, build an assembly, do a takeoff, and export an estimate.
Quickstart
The fastest way to learn Blueprint Crusher is to run a small project all the way through. This walkthrough takes about 10 minutes and uses real features end-to-end.
What you’ll need
- One supplier price sheet (PDF, XLSX, or even a scanned image).
- One drawing PDF you can practise measuring against.
- A blank project to play with.
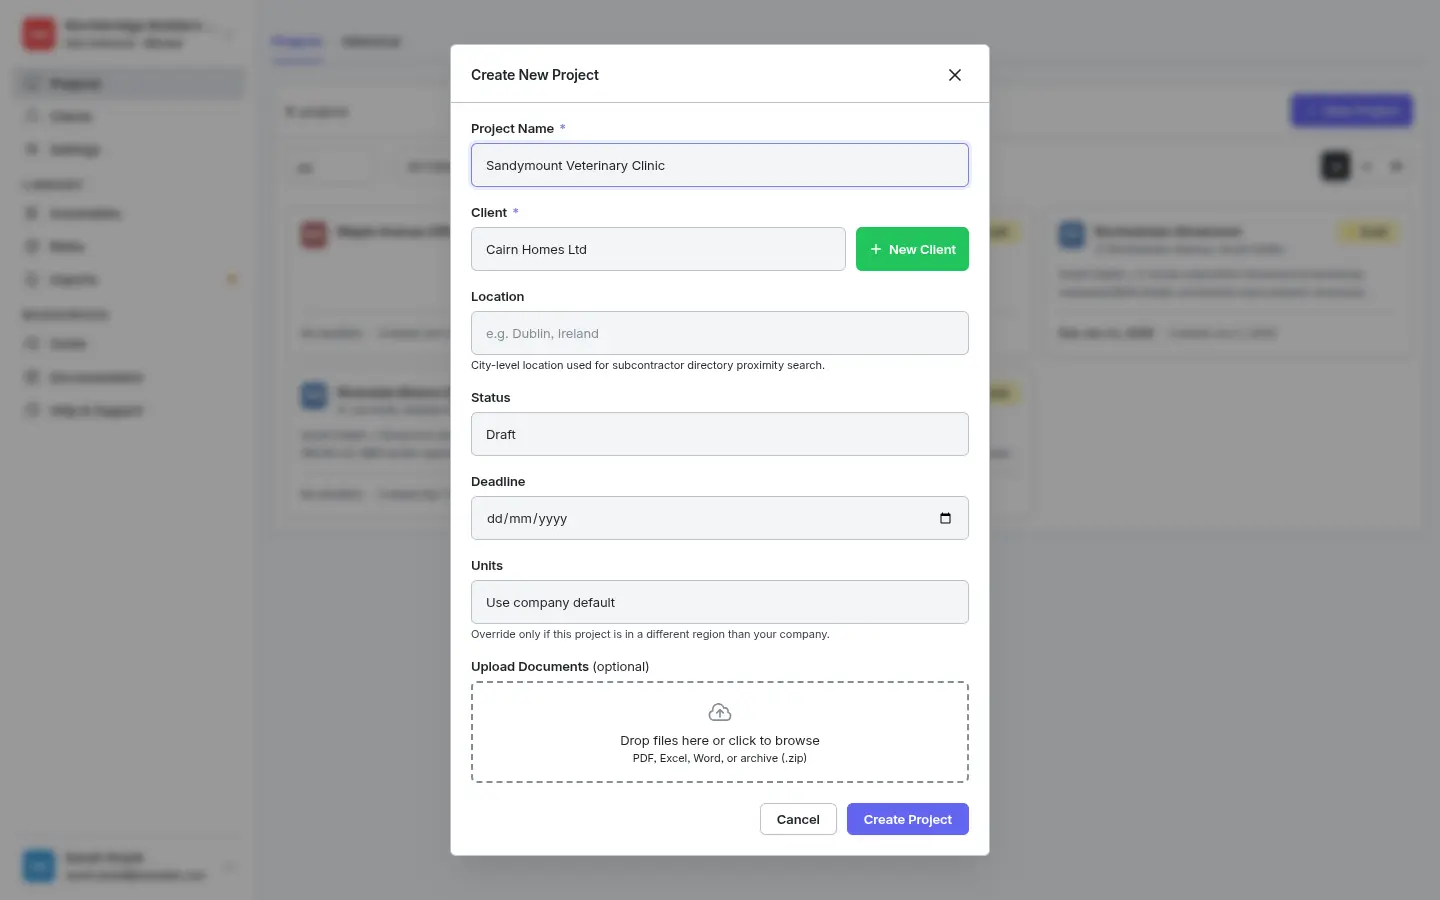
1. Create a project
Projects are the containers for everything you do — drawings, takeoff measurements, the priced estimate.
- Click Projects in the sidebar, then + New Project (top right).
- Fill in the project name, address, and (optionally) a client.
- Click Create. The project lands in your list as a Draft and opens on the Brief tab.
2. Import a price sheet
Populate your Rate Library quickly by letting the app’s vision AI read a supplier’s price list. Once committed, the products and their prices land in the Rate Library and stay available to every project you ever run.
- Go to Library → Imports and click Upload Price Sheet.
- Drop in the file, pick the Supplier, set the Price date (defaults to today). Upload starts automatically.
- When extraction finishes, click Review to inspect each row, fix any pack/unit mistakes, and commit.
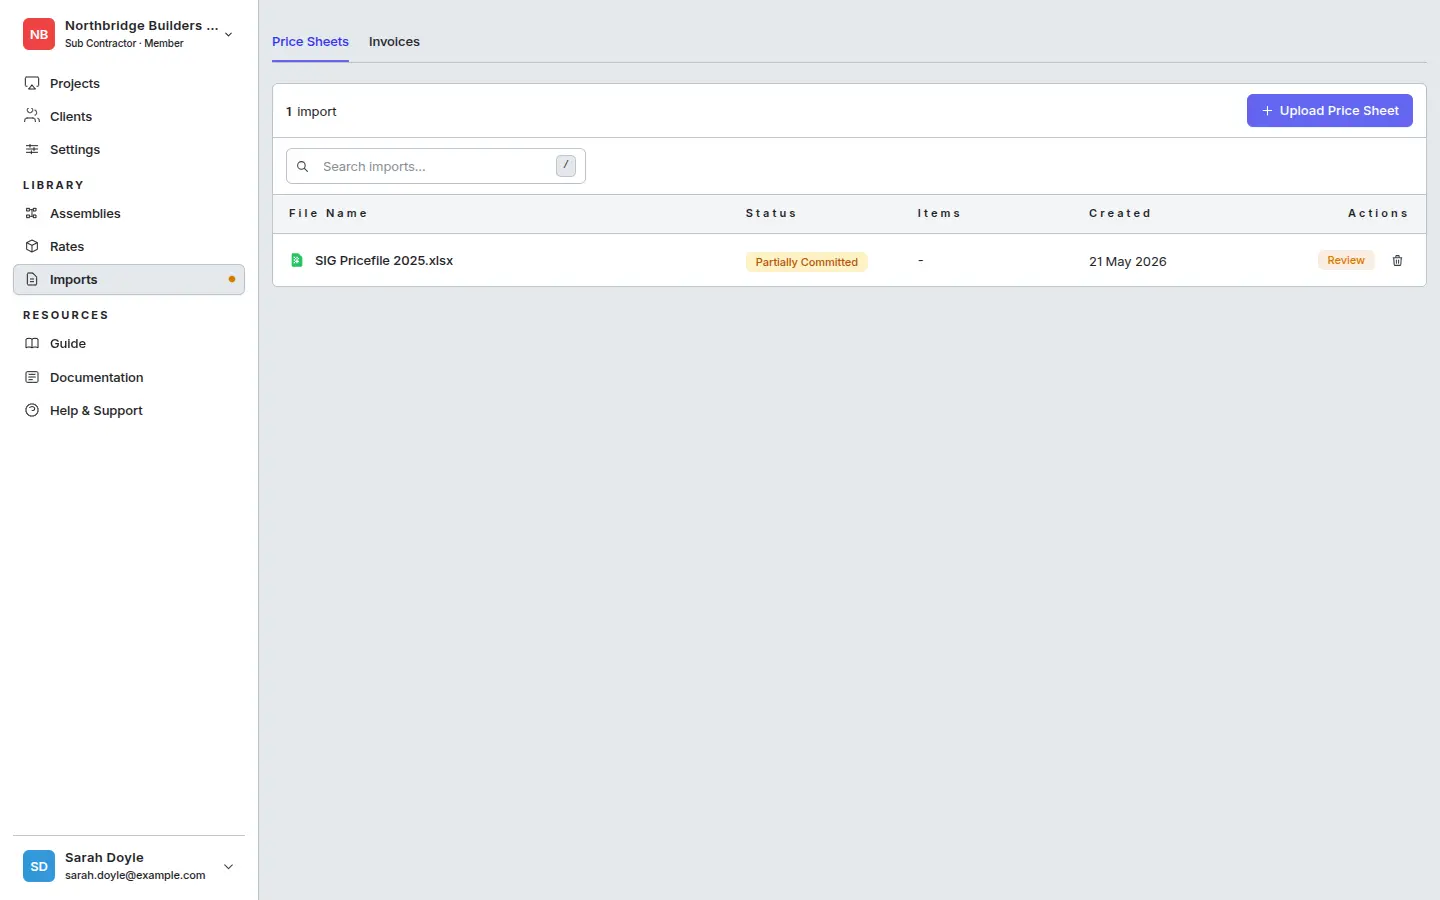
Full guide: Importing price sheets.
3. Upload drawings to the project
Back in your project, switch to the Documents tab to load the drawings you’ll measure off.
- Open the project → Documents tab → Upload.
- Drag in your drawing PDFs and click Upload Files.
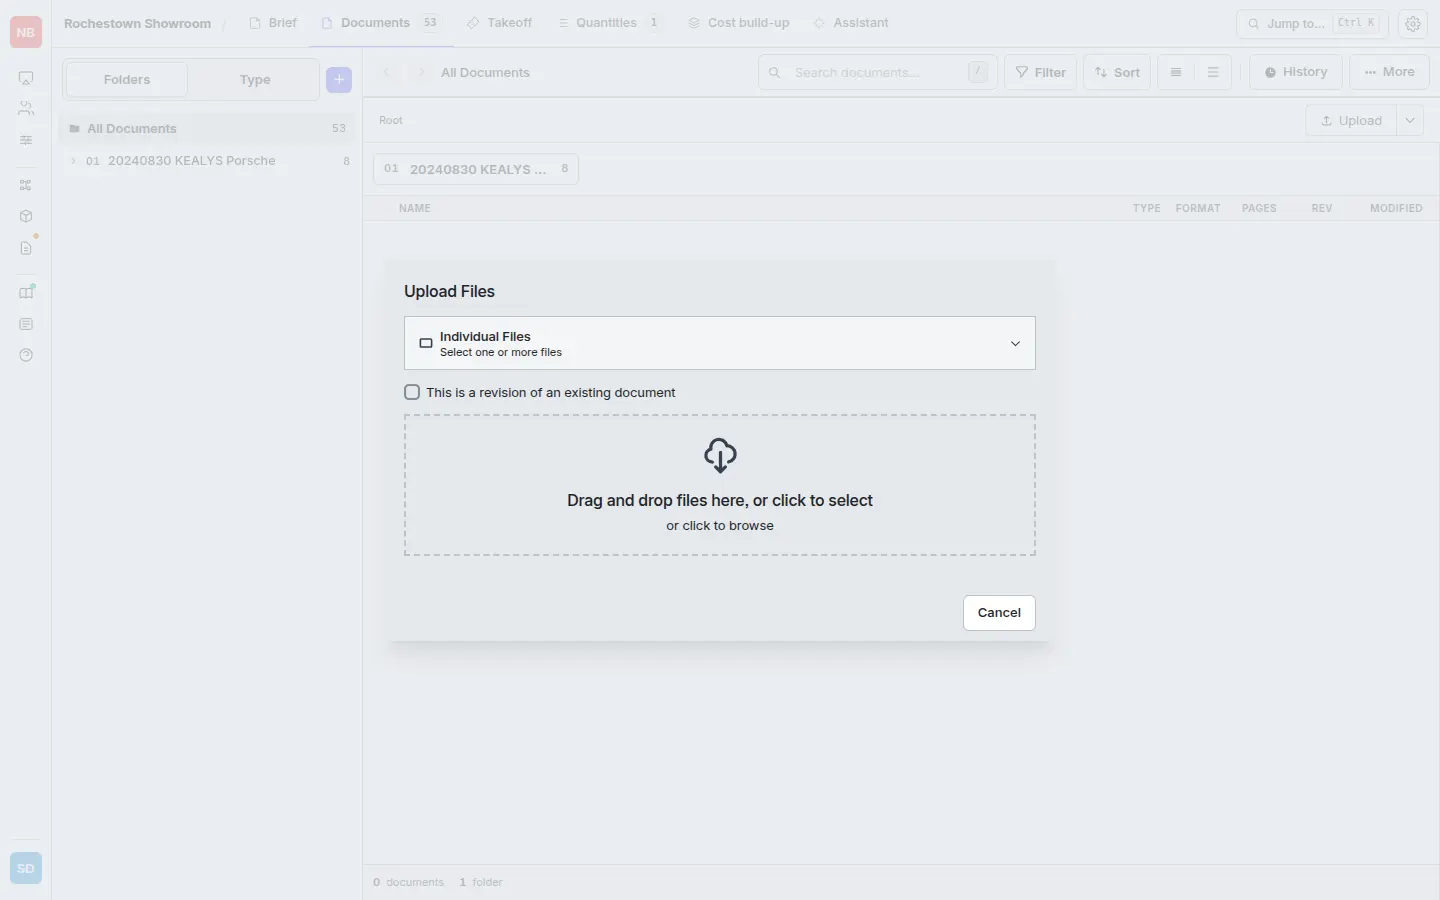
Blueprint Crusher processes each PDF in the background — once processed, drawings appear automatically on the Takeoff tab.
4. Measure quantities and add a line item
The Takeoff tab is where you measure off drawings and turn shapes into priced line items.
- Open the Takeoff tab. You’ll see the drawing register — every sheet detected across your uploaded PDFs, with calibrated scale.
- Click a drawing to open the viewer. Use the toolbar to measure Area, Length, or Count.
- Click + Item on the groups panel and the New Item modal opens. Name the item and bind it to an assembly and specification in a single pick — both are AI-suggested from your drawing context.
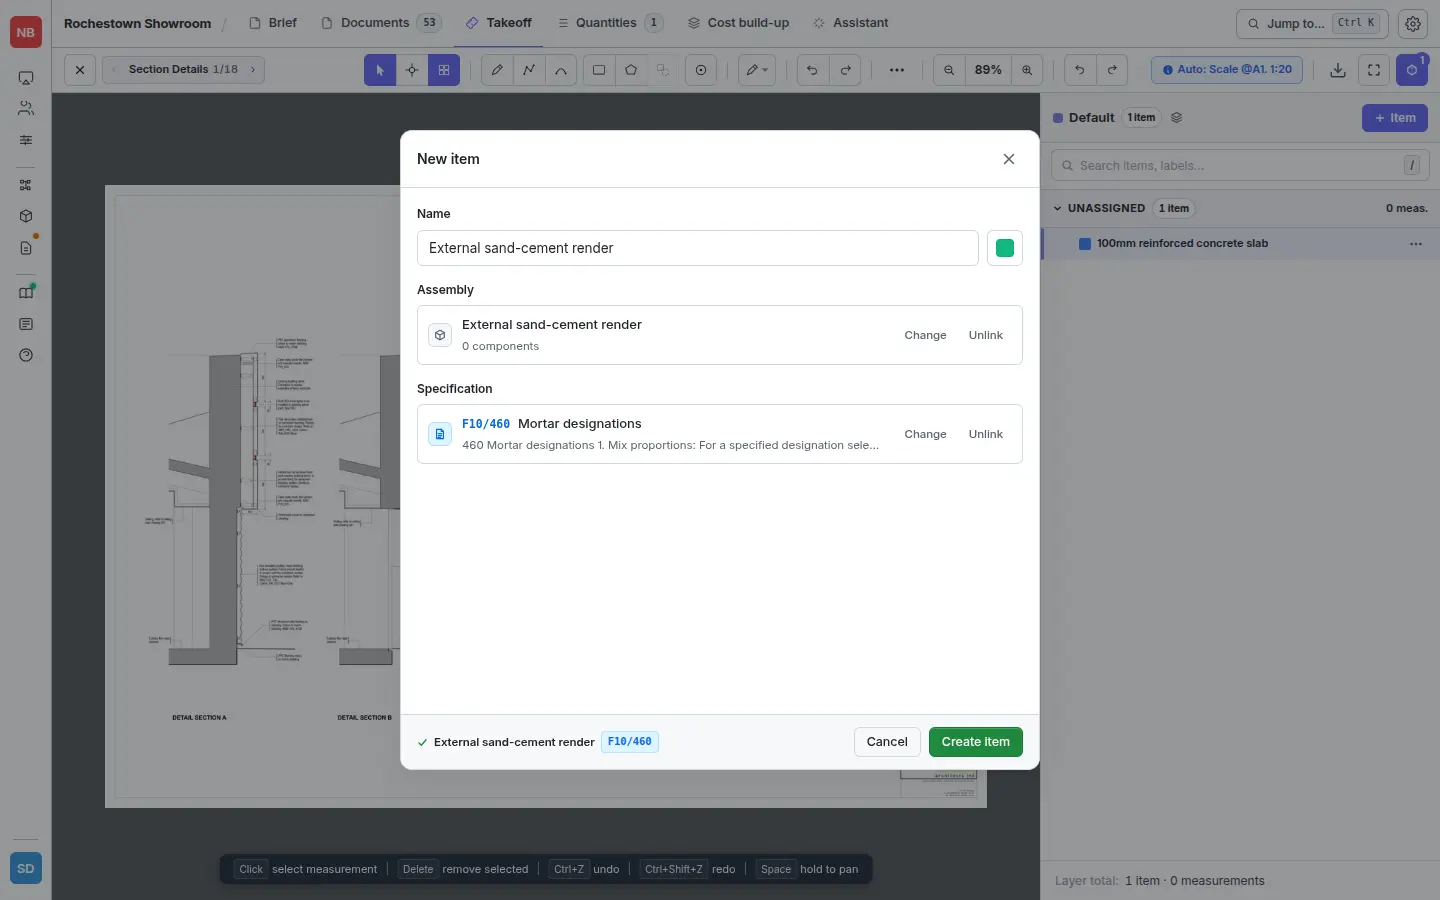
The bound assembly is what prices the line. The specification (e.g. F10/460 Mortar designations) keeps the item traceable back to the spec document.
Full guide: Measuring.
5. Price the items on Cost build-up
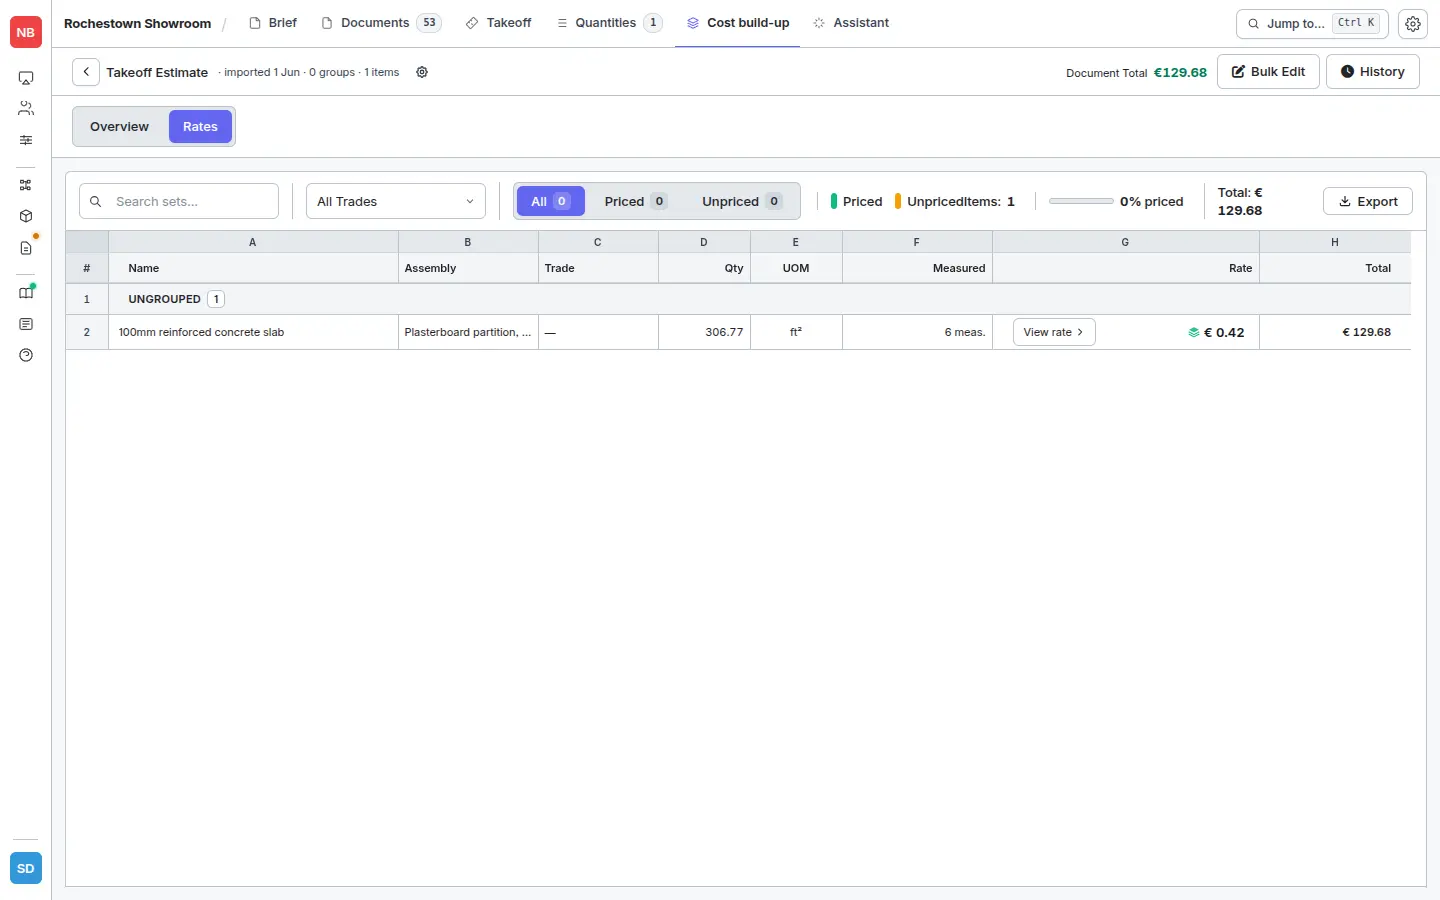
Switch to the Cost build-up tab. The app auto-creates a Takeoff Estimate document containing every item from your takeoff — ready to price.
- Click Builder on the Takeoff Estimate row.
- The Builder lands on the Overview tab — a snapshot of how many items are priced, partial, or unpriced.
- Move to Rates. Each unpriced item has a Build rate button. Click it → Apply Assembly to pick from AI-suggested matches, your custom assemblies, or system templates.
The line populates with a unit rate, the assembly’s component breakdown, and (once measured) a total:
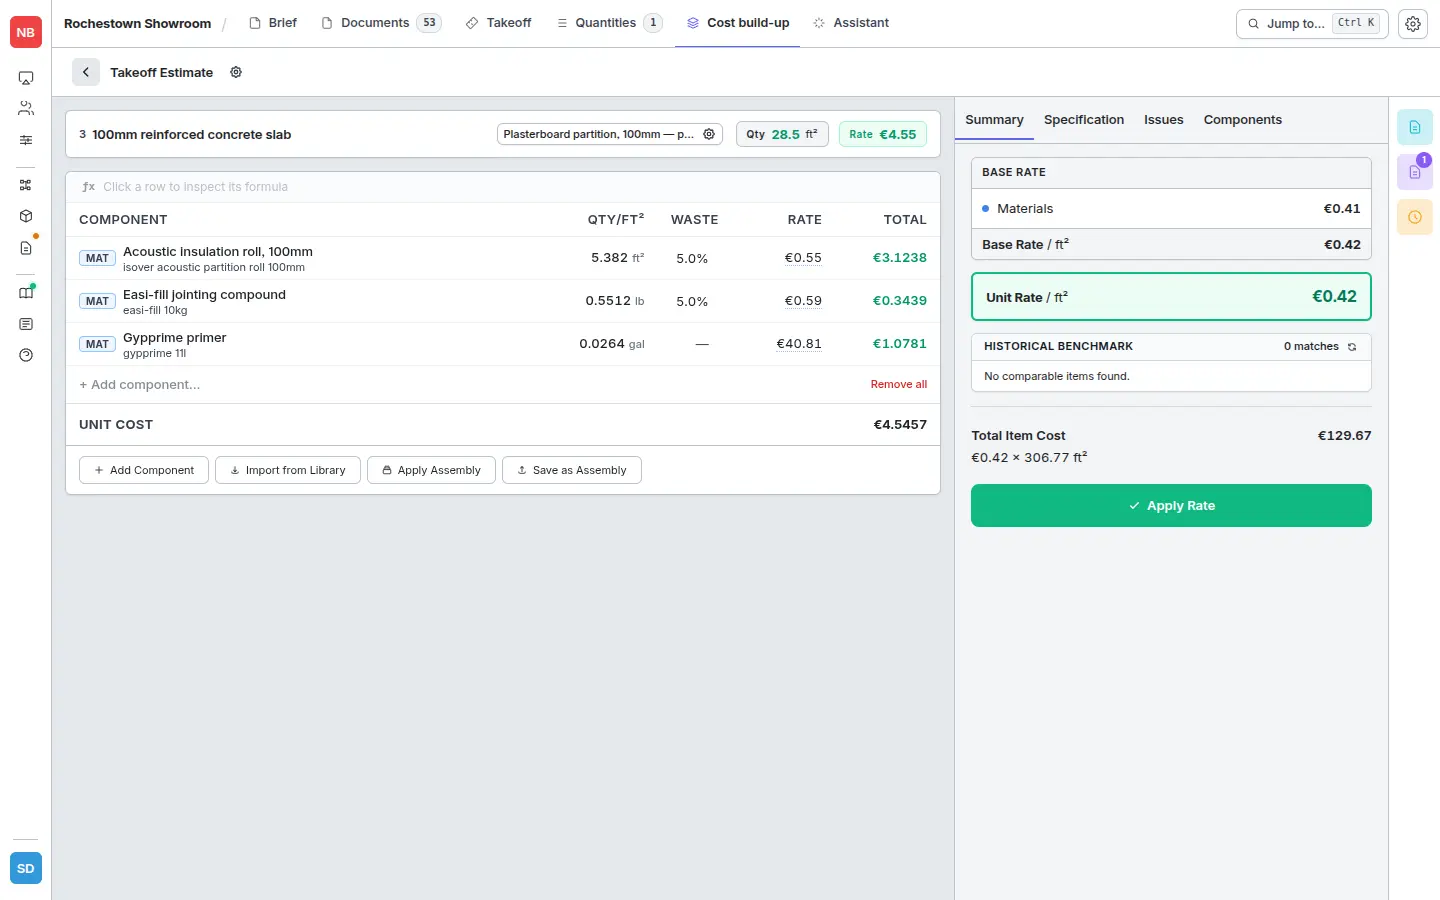
Click View rate on any priced row to inspect the full build-up — every component of the assembly, its quantity, its supplier rate, and its contribution to the total:
Full guide: Applying assemblies in takeoff.
6. Export the estimate
- Once items are priced, open the Estimate view from the Cost build-up tab.
- Click Export → Excel, choose your options (rates on/off, grouping, headers), and Download.
Full guide: Excel export.
That’s the full loop — price sheet to Excel estimate. From here, browse:
- Rate Library — products, prices, suppliers.
- Assemblies — variables, tips, and pitfalls.
- Estimates — when to export with rates on vs. off.